Oral health of pets is of great importance to us here at Hanover Veterinary Hospital. We take great pride in advocating to start pets on a dental hygiene regimen as early as possible. However, even with the most compliant owners, we still suggest a dental checkup under anesthetic as we have no way of checking diseases lurking underneath the gum line in an awake pet. This week I was able to assist Dr. Curtin in doing my own dog’s dental. Curious to see what your fluffball’s dental look like compared to yours? Here’s a typical day in the dental suite.
Every dental exam/surgery start with a physical exam, and ideally, pre-anesthetic blood work to determine additional risks and adjust drugs and doses accordingly. An intravenous catheter is placed, and IV fluid is started to maintain proper blood pressure and hydration. Once they have been sedated, induced, and intubated under general anesthesia, patients are hooked up to monitors, and a designated surgery technician is responsible for checking their values regularly throughout the entire procedure.
 Step 1: Procedure begins with taking dental radiographs to check on the status of the mouth, more specifically to inspect areas that are below the gum line including periodontal space, underlying bone, the presence of unerupted teeth, periapical lysis, etc.
Figure 1. On left, the tube head concentrates the x-ray beam to the desired area while the plate is wedged inside the pet's mouth. This machine is identical to what your dentist has at his/her office and requires absolute stillness to take accurate radiographs.
2. Next up, the veterinarian performs dental charting, periodontal probing and record gross clinical observations. Information gathered from the dental radiographs, and dental probing is reconciled, and dental/ surgical recommendations are made.
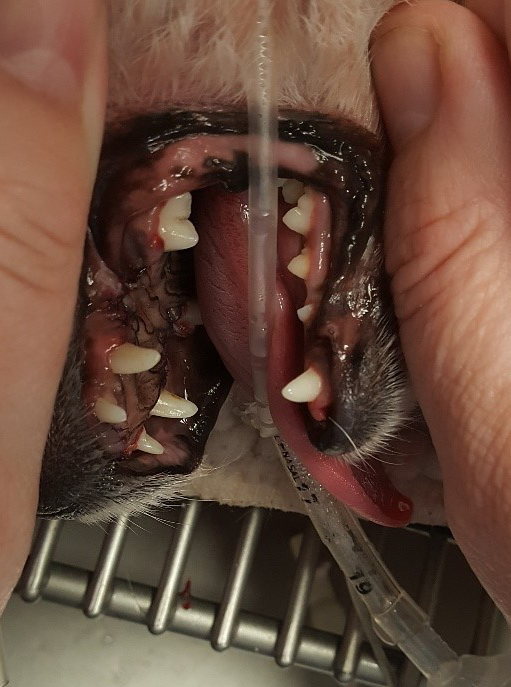
Figure 2. Below, you can see the visible part of Casper’s upper and lower incisors and on the right, is a radiograph of her lower teeth. See how her lower incisors do not look that diseased in the photo? However, if you compare it to the radiograph, you will see vertical bone loss and mottled appearance of the underlying bone. On dental probing these incisors had deep pockets and mobility of 2-3. Yikes! Those must be removed!
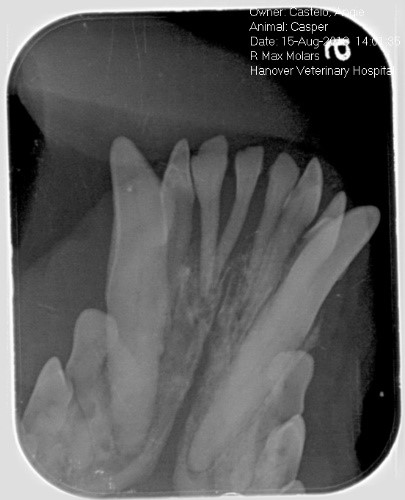
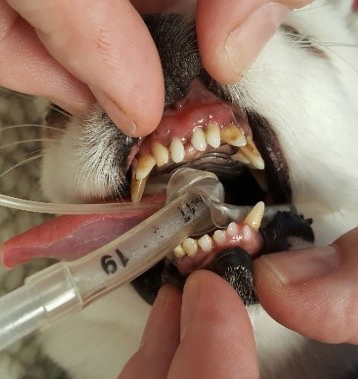
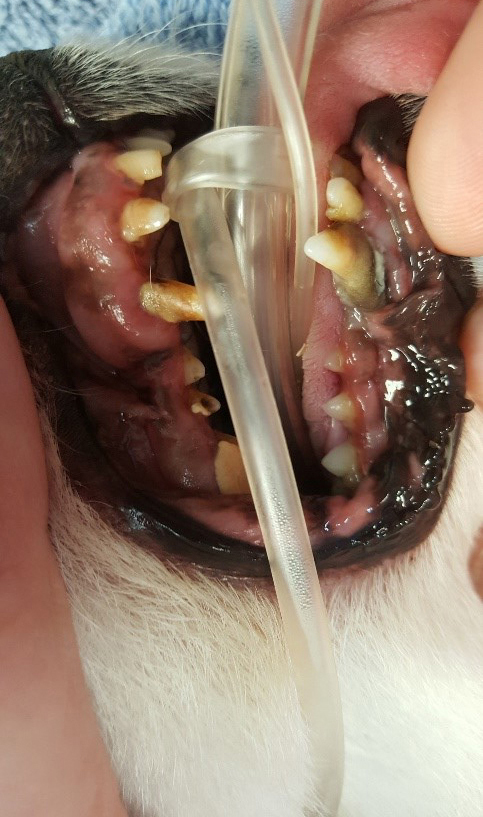
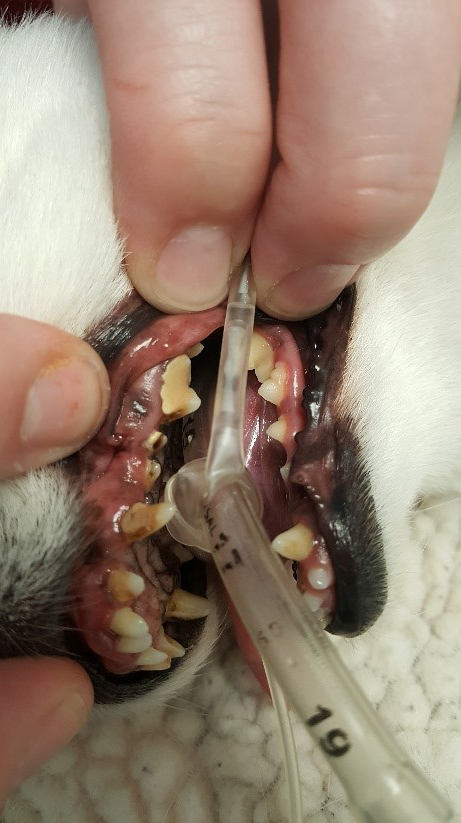
Figure 3. On right, during the exam we take six pocket measurements of the entire tooth, front and back, check for mobility, gum recession, furcation exposure, etc. Mucosa, gum health, and any other visible abnormalities are also noted.
3. Veterinary technicians clean using ultrasonic cleaners. Visible tartar is removed during this process and is followed up with polishing to smoothen enamel scratches that may attract bacteria.
 4. Local blocks are placed to “freeze” the nerves around the tooth/teeth that need to be extracted. We are now ready for surgical extractions!
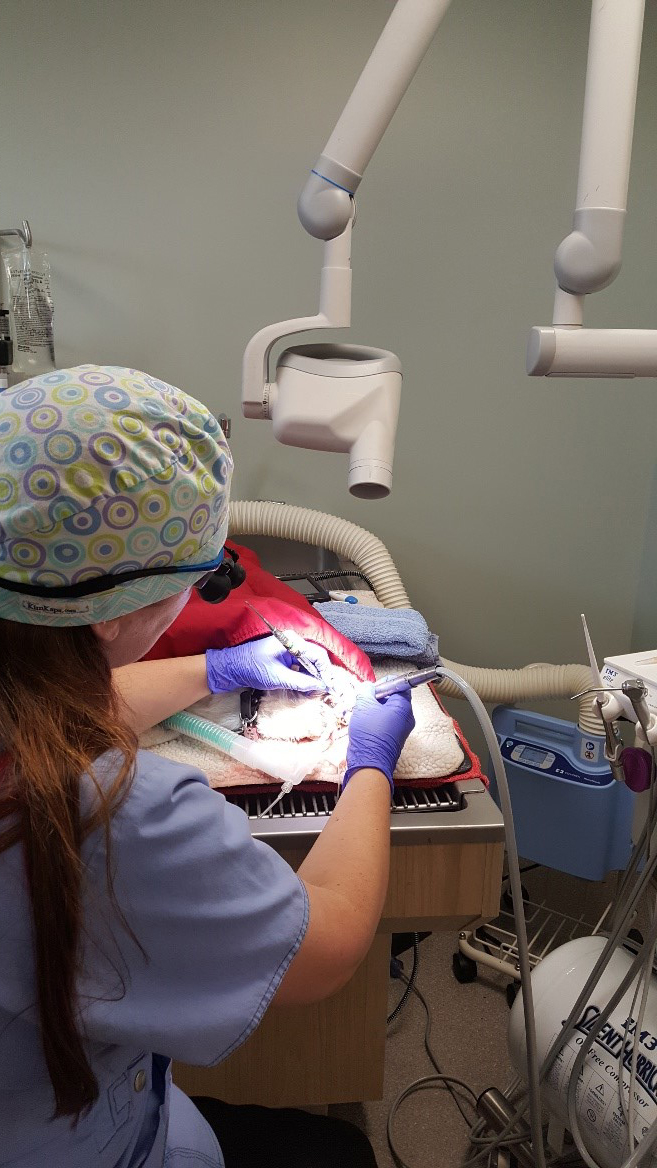
Figure 4. On left, Dr. Curtin is using a tapered fissure bur to section off multirooted tooth for extraction as a single root. This step makes it easier to remove the tooth and keep the entire root intact on its way out.
5. Radiographs are taken before closing/ stitching to check for retained/broken roots.
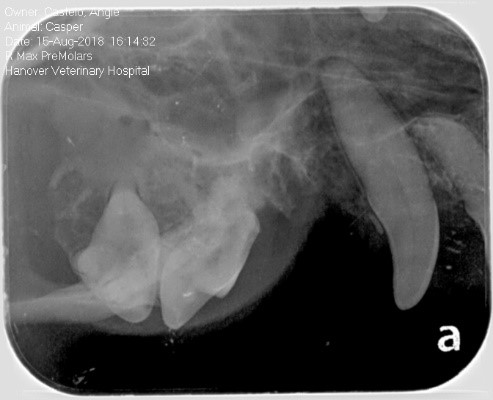
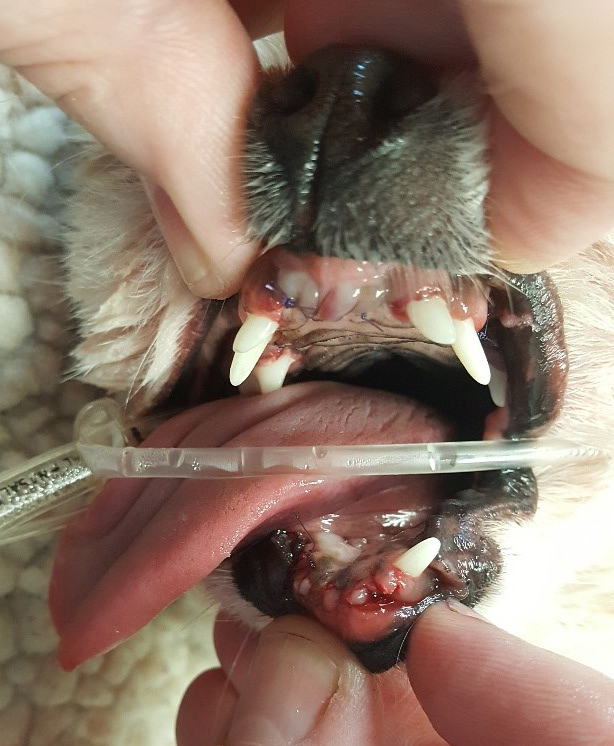
Figure 5. Casper's premolars 1 and 2 were removed successfully! No root tips were left behind confirmed by radiograph before closing. Remember that retained roots can still be a source of great pain and infection. So, this step is a definite must!
 6. We are now ready to stitch her gums up with a thin absorbable suture to prevent excessive irritation.
Figure 6. On left, after proper curetting to remove diseased tissues, Casper was stitched up.
 7. Recovery and discharge. Ensure pain-free status and set the client up for success at home.
Figure 7. On right, Casper's before and after shot! What a difference dental cleaning makes!
Figure 8. Below, Casper was given anti-inflammatory and pain meds to ensure she is comfortable after undergoing major surgery. Clients are also strongly advised to keep their pets quiet and provide soft food for the first little while until their stitches are all healed up.
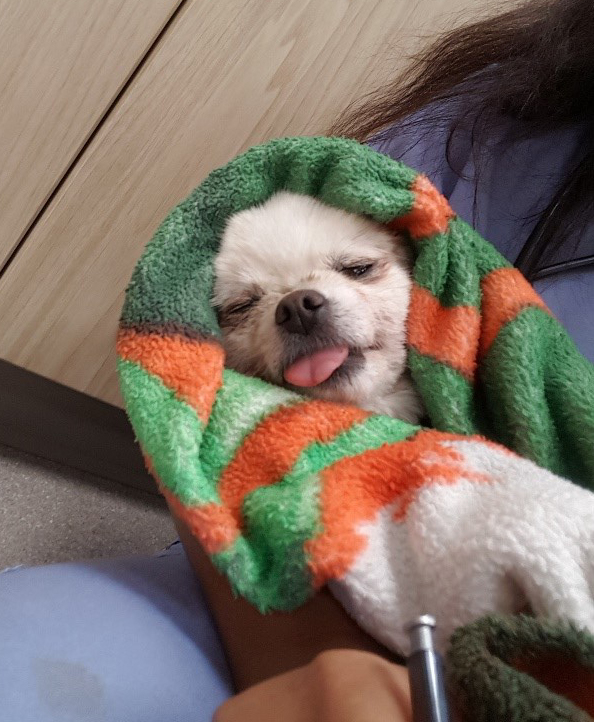 Casper recovered well the day after her surgery and had a voracious appetite. Increased appetite after a dental seems to be common as pets are freed from pain and discomfort. See, dentals do not have to be scary, and it can significantly improve the quality of a pet's life.